Check the oven door gasket first. It’s the only free, two-minute test, and it causes a specific pattern: heat felt escaping near the door edge, uneven or slower baking, and a longer preheat time. If the gasket checks out fine, the problem is more likely a weak hinge, a misaligned door, or a part deeper inside that needs a technician either way.
Key takeaways
- Check the gasket first with a paper test. Never use a dollar bill in a hot oven, since paper is the only test method that’s actually safe at oven temperatures
- A failing gasket causes a specific pattern: heat felt escaping near the door edge, uneven or slower baking, and a longer preheat time
- A weak hinge or misaligned door causes a similar-looking gap, but the fix is different from replacing the gasket
- A cracked inner glass panel or a blocked vent can let heat out even when the gasket itself is fine
- If the paper test comes back clean and the oven is still losing heat, the problem is in a part that needs a trained technician
- Appliance Gasket quotes one exact price after getting your oven’s brand and model, with a $75–$95 diagnostic fee credited toward your repair, and offers same-day service across DC, Maryland, and Northern Virginia
- Call (202) 200-8501 for a model-based quote
Check the gasket first: the free paper test, not a dollar bill
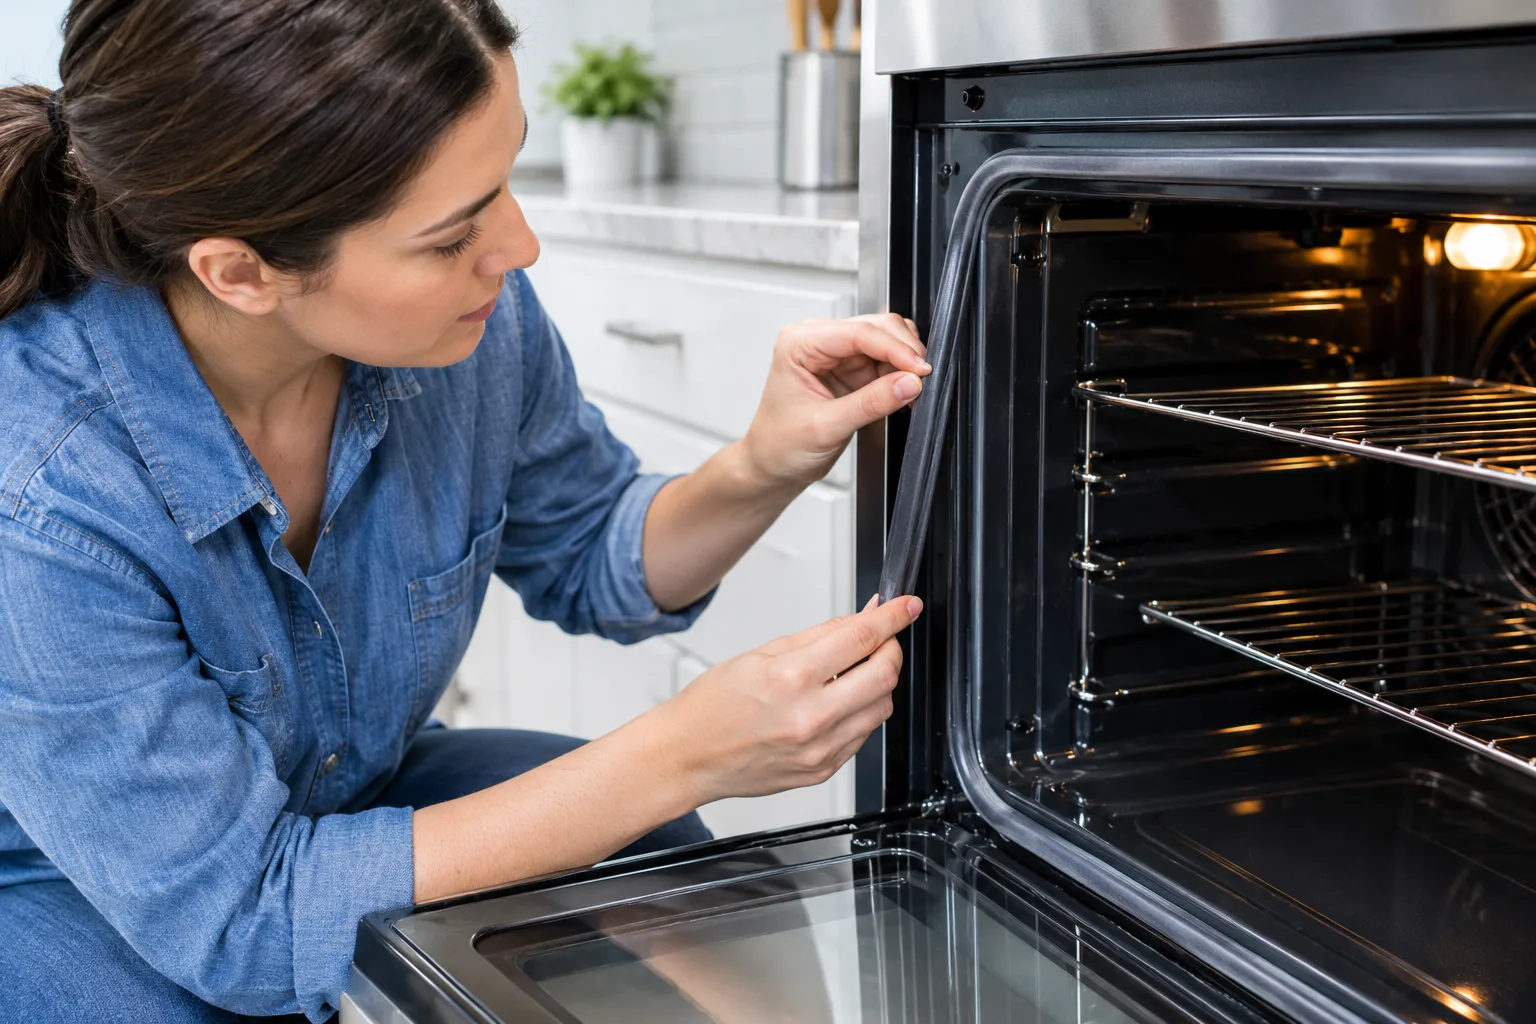
With the oven cold, close a strip of paper in the door at several points around the full frame, top, bottom, both sides, and each corner, then pull gently. If it slides out easily at any point instead of resisting, the seal has lost its grip right there.
Use paper for this, not a dollar bill. The dollar-bill test works well on a refrigerator gasket because the fridge sits at room temperature, but an oven door gets hot enough to scorch or catch a bill left pressed against it. Paper is the only version of this test that’s actually safe to run on an oven, which is why every real source on oven door seals uses it instead.
Once the paper test is done, run a second check while the oven is warm, not hot enough to burn you. Hold a hand two to three inches from the door edge and sweep it around the full perimeter. A hot spot you can feel clearly is the same leak the paper test just found, confirmed a second way. Keep both tests separate and run them in that order: paper cold, hand warm.
Signs it really is the gasket
Heat felt escaping near the door edge while baking, a strip of paper that slides free during the test, visible hardening, cracking, or flattening of the gasket rope, or a section that’s popped out of its channel all point to the gasket. Baking that runs slower or less evenly than it used to is often the first thing people actually notice, before they ever think to check the seal itself.
The reason this happens has to do with heat cycling. Every bake cycle exposes the gasket material, usually a fiberglass or rubber rope, to high heat and then lets it cool back down, and that repeated expansion and contraction is what eventually hardens and cracks it. Self-clean cycles push this along faster than regular use, since those run far hotter than any normal bake. American Home Shield’s guide to replacing an oven door gasket describes this same pattern: food cooking unevenly, the oven not reaching the set temperature, and heat felt escaping from the door at high temperatures, which lines up closely with what shows up on an Appliance Gasket inspection across Washington DC, Maryland, and Northern Virginia.
These signs tend to show up together rather than one at a time. If you’re feeling heat at the door and also noticing one side of a dish baking faster than the other, that’s two symptoms from the same cause, not two separate problems.
Signs it’s the hinge or a misaligned door, not the gasket
A door that springs back slightly instead of staying firmly shut, a gap that’s noticeably wider at the top than the bottom, or a door that doesn’t sit flush after being leaned on or bumped all point to the hinge or door alignment rather than the gasket. A ridge of baked-on spill along the frame can cause the exact same symptom by physically holding the door open a fraction, even with a perfectly good seal underneath it.
This is the step most people skip, and it’s an easy one to miss, since a worn gasket and a weak hinge look almost identical from the outside: heat escaping, slower baking, a door that doesn’t quite feel tight. The difference only shows up once you’ve already ruled the gasket out. Replacing the gasket on a door that’s propped open by hardened spill residue, or that’s lost hinge tension, won’t fix anything, since the seal was never the actual point of failure.
Checking for this takes about as long as the paper test itself. Run a hand along the closed door for an uneven gap, and take a look at the frame the door closes onto for any ridge of buildup before assumihe rope seal needs replacing.
Signs it’s something deeper than the door
An outer door glass that’s unusually hot to the touch even with a good gasket, a vent blocked by foil or debris, or an oven that won’t hold its set temperature at all despite a door that closes and seals correctly point to a cracked inner glass panel, a blocked vent, or an igniter or control board issue. None of these are gasket problems, and none of them get fixed by replacing a seal that was already doing its job.
The reason this category needs a technician rather than a DIY fix comes down to what’s actually being tested. Confirming an igniter or control board fault means checking live electrical or gas components behind the oven’s front panel, and that’s exactly the point where even the most thorough owner checklist has to stop. A cracked inner glass panel can usually be spotted by eye, but an igniter that’s intermittently failing, or a control board that’s misreading the internal temperature, needs equipment and training that go past a paper test and a hand check.
If you’ve run through the gasket and hinge checks above and the oven is still behaving oddly, this is the category it’s most likely falling into.
What heat loss is actually costing you
A leaking oven door makes the unit run longer and hotter just to hold its set temperature, and that shows up as a slower preheat, inconsistent baking results, and a higher energy bill with no other explanation. The oven isn’t broken in the sense of refusing to turn on. It’s working harder than it should to compensate for heat that’s leaking out as fast as the heating element can replace it.
This matters because it’s easy to adapt around a problem instead of fixing it. Preheating ten minutes earlier, or rotating a dish halfway through baking to even out the heat, treats the symptom every time instead of the cause once. A new gasket, when that’s genuinely the issue, is a far smaller cost than letting an oven run inefficiently for months or than waiting until a worn seal leads to a bigger repair elsewhere in the door assembly.
Repair or replace: when a new gasket is enough
If the paper test fails and the other signs point to the seal, heat at the door edge, slower baking, a gasket that’s visibly worn or hardened, replacing the gasket alone usually solves the problem completely. It’s a contained, well-defined fix for a well-defined cause.
If the paper test comes back clean and the oven is still losing heat, noisy, or struggling to hold temperature, the issue is almost always the hinge, the inner glass, the vent, or the control board, and no amount of gasket maintenance or replacement will fix that. Treating the seal as step one rather than guessing at the more expensive parts first is what actually saves time, whether the real fix turns out to be a new gasket or a technician visit for something deeper.
The bottom line
Run the paper test first, since it’s free, safe, and takes about two minutes. If it fails and the other gasket signs line up, a new seal usually solves it completely. If the paper test comes back clean, check the hinge and door alignment next, then rule out a cracked glass panel or a blocked vent. Once it’s clear the issue sits deeper than the door itself, that’s a technician job, and Appliance Gasket quotes one exact price after getting your oven’s brand and model, with a $75–$95 diagnostic fee credited toward your repair, and offers same-day service across DC, Maryland, and Northern Virginia.
Get your oven’s door seal checked in DC, MD & VA
If the checklist above doesn’t give you a clear answer, the safest next step is a technician diagnosis rather than guessing further. Send your oven’s brand, model, and ZIP code and Appliance Gasket will quote one exact price with a $75–$95 diagnostic fee credited toward your repair, with same-day appointments available across Washington DC, Maryland, and Northern Virginia.
Appliance Gasket’s wall oven repair service covers exactly this kind of door, hinge, and gasket problem, with door-seal repair handled as a specialty rather than an afterthought. For a range or freestanding stove, the range repair team brings the same door-seal expertise to heat escaping around a range oven door. If you’d rather talk through what you’re seeing before booking anything, reach out through our contact page and we’ll walk through it with you.
Appliance Gasket
Phone: (202) 200-8501
Email: Ilhamfraidoon@gmail.com
Address: Fairfax City, VA 22031
Serving Washington DC, Maryland & Northern Virginia
Frequently asked questions
Q1: Is a small gap at the top of the oven door normal?
Sometimes, yes. A few ovens are designed with a slight, even gap at the very top of the door by the manufacturer, and that’s not a sign of a problem on its own. What’s not normal is a gap that grows wider toward the top, since that pattern points to a sagging hinge rather than a design feature, and it’s worth running the paper test at that spot specifically to check.
Q2: Can I replace an oven door gasket myself?
Often, yes, on a cold oven. Most oven door gaskets hook, clip, or press into a channel around the frame rather than being glued in place, so swapping a worn one for a new one is usually a straightforward job once the oven has cooled and power is disconnected. The harder part is usually getting the exact gasket that matches your oven’s brand and model rather than the replacement itself.
Q3: Why is my baking uneven since the door stopped sealing tightly?
A leaking door creates a cooler zone right where the heat is escaping, so the side of the oven nearest that leak runs at a lower temperature than the rest of the cavity. That’s why food near the door edge can come out underdone while the back of the oven bakes normally, even though the thermostat reading looks fine.
Q4: Does a worn door seal really raise my energy bill?
Yes. An oven with a leaking door has to run its heating element longer and more often to hold the set temperature, since warm air is escaping as fast as it’s produced. That extra run time shows up as higher energy use on every bake, not just a slower preheat.
Q5: Can a dirty gasket cause the same symptoms as a worn-out one?
Yes, and it’s worth ruling out before assuming you need a full replacement. A gasket covered in baked-on grease or food residue can fail the paper test simply because buildup is holding it away from the frame, not because the rope itself has hardened or cracked. Wiping it down with warm water and a mild cleaner and retesting is a quick check before ordering a new part.
Q6: How long does an oven door gasket usually last?
It depends heavily on how often the oven is used and how often the self-clean cycle runs, since that cycle’s high heat ages the gasket material faster than normal baking does. There’s no single fixed lifespan that applies to every oven, which is part of why the paper test matters more than a replacement schedule: it tells you the gasket’s actual condition rather than relying on a guess based on age alone.